41 making a rain gauge
Rain Activity Lesson - Making A Rain Gauge With Kids - Gardening Know How Making a rain gauge is a quick project, but young children should be assisted and supervised during the bottle cutting. Cut off the top of the bottle, just at the start of the widest point. Turn this top portion upside down on the bottle and tape it in place. Make sure the top is off. WEATHER DIY | Make your own rain gauge! - YouTube This experiment involves creating your own rain gauge, an instrument meteorologists use to measure rainfall. Follow along with meteorologist Kristina Pydynowski and you too can measure the...
How to make a Rain Gauge | dArtofscience - YouTube 109K views 2 years ago Its the time for rain and if you want to measure it, its simple if you watch this video on How to make a Rain Gauge. You can literally make this in 3-5 minutes and...
Making a rain gauge
How To Make a Rain Gauge - Ultimate Scouts Follow along with this video to see how to make a rain gauge. DIY Rain Gauge. *Tip* - Place rocks or pebbles in the bottom of your bottle to keep it from tipping over. Fill water to just above the rocks and mark that spot as 0″. You can now measure any rain fall from that measurement. Cub Scout Awards Tracker - (With Free Printables) DIY Rain gauge craft for kids - Mama's Must Haves A rain gauge is a meteorological instrument that is used to measure rainfall over a specific time and area. Making a simple rain gauge is a quick activity for outdoor learning, and it's perfect for younger children! The next time you check the weather and see rain in the forecast, you can share the weatherman's prediction with your children… Make a Rain Gauge to Study Precipitation | Lesson Plan - Science Buddies If you use the water hose to model rain: Let the students place their rain gauges in groups. Test the fine mist (soft rain) kept steady for 30 seconds and the heavy rain that lasts 10 seconds. Make sure to point the hose up so the water comes down almost vertically over the gauges.
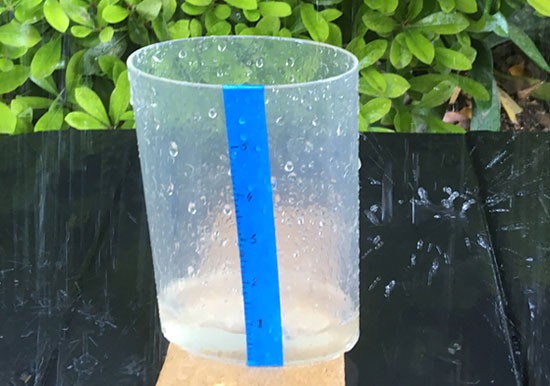
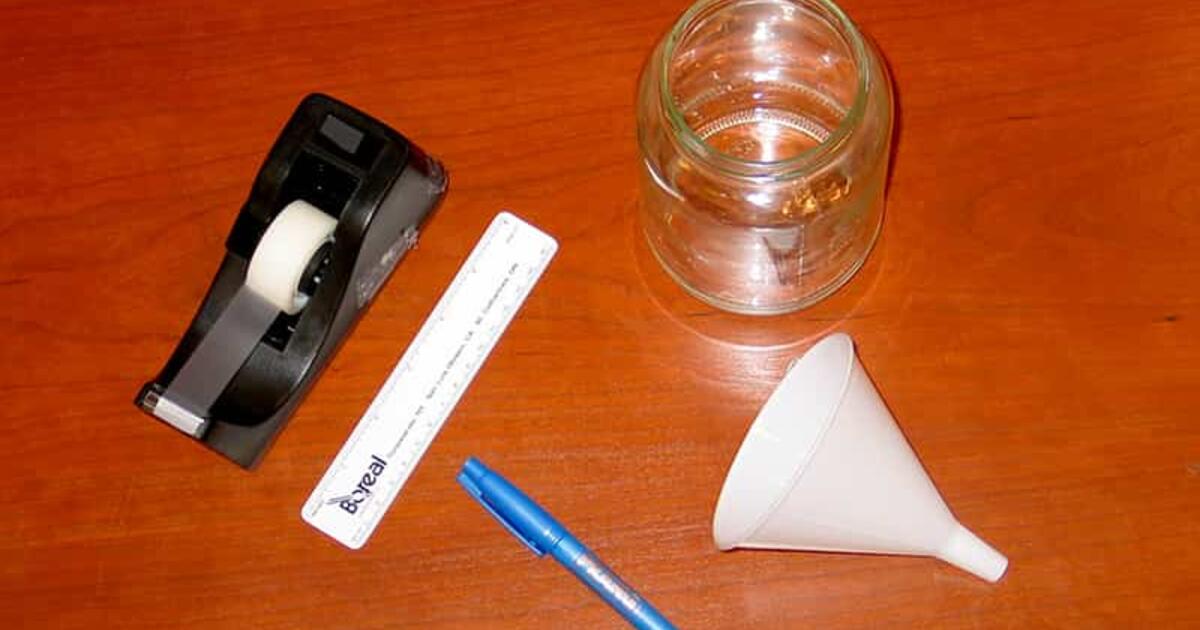
Making a rain gauge. How to Make a Rain Gauge - YouTube How to Make a Rain Gauge - YouTube 0:00 / 1:29 How to Make a Rain Gauge Howcast 9.04M subscribers Subscribe 167K views 12 years ago Full Playlist:... Make a Rain Gauge to Measure Rainfall - American Museum of Natural History What To Do Part 1: Make Your Rain Gauge Remove the jar's label. (If it's hard to remove, try soaking the jar in warm, soapy water for 5 minutes.) Apply a piece of tape on the side of the jar, running from the bottom to the top. Then use the ruler and a permanent marker to mark inches and half-inches along the tape, starting from the bottom. Make a Rain Gauge - Tinkergarten Step 2: Make a rain gauge. Find a jar or clear container to use as your rain gauge. Kids can draw or write on a piece of paper and use it to decorate the rain jar to make it feel extra special (just be sure to cover the paper with clear tape to keep it dry in the rain). DIY Rain Gauge | Science project | Education.com This will be the bottom of your rain gauge. Set the ruler against the vertical tape so that the "0" line lines up with the bottom mark. Use the marker to mark every quarter-inch (or, if you want to get fancy, every eighth-inch) along the piece of tape. Then label the inches from bottom to top.
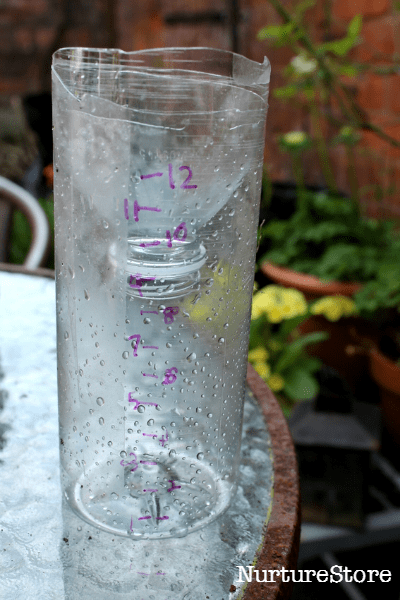
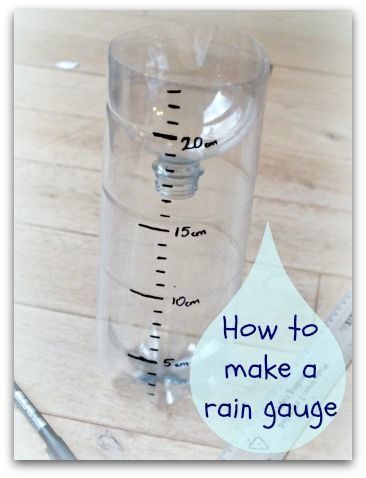
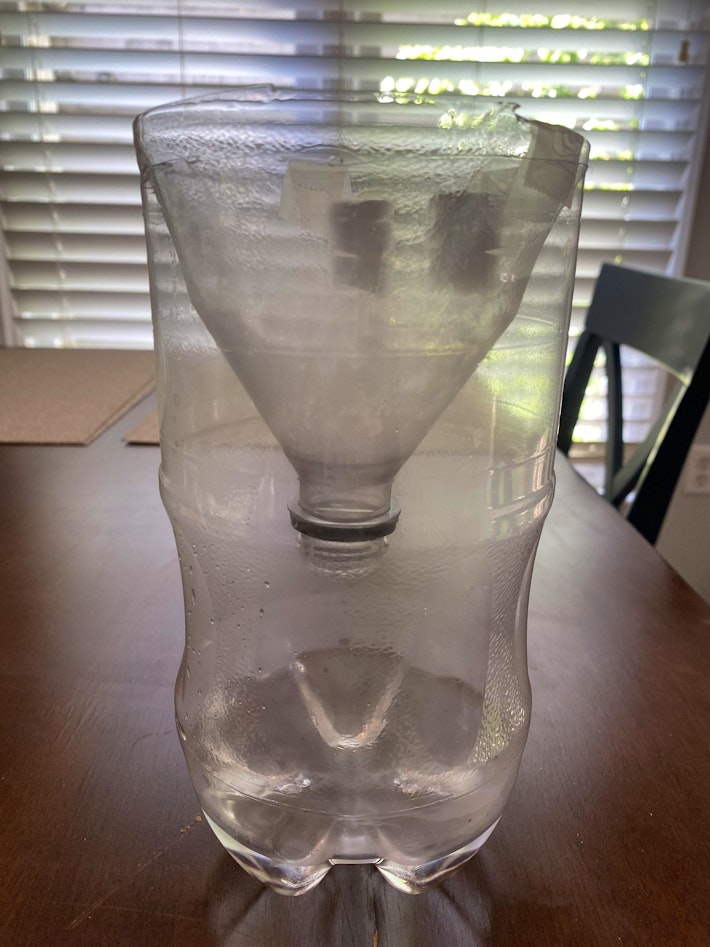
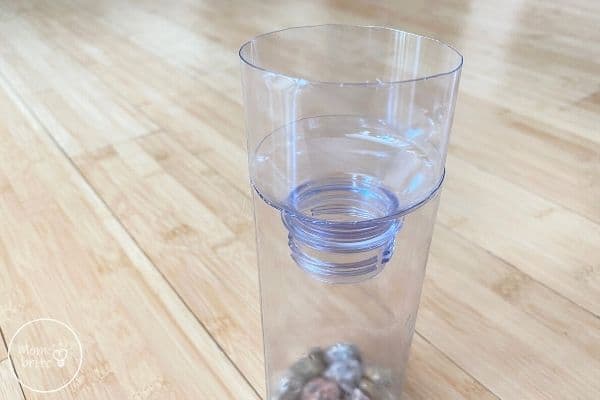
How to Build a Rain Gauge: 15 Steps (with Pictures) - wikiHow Creating a Rain Gauge With Built In Measurement Download Article 1 Cut the top off of the bottle. Use a pair of scissors to carefully cut the top of the bottle off. Cut just beneath where the bottle begins to narrow. A plastic soda bottle works best. Be sure to remove the paper label completely. [1] Make a Rain Gauge : 8 Steps (with Pictures) - Instructables Rain gauges must be placed clear of obstacles so that raindrops do not splash into, or out of, the collecting funnel. On the ground, one should have at least 10-meter clearance from all sides. This could be a kind of luxury for schools in metropolitan cities. Weather Science - How to Make a Rain Gauge There are two ways to make the rain gauge, either by using an empty jar or a plastic bottle. Jar Rain Gauge Place the ruler on the side of the jar and mark in cm up the side. Plastic Bottle Rain Gauge Cut the top off the bottle, and place upside down inside the main body. Get an adult to help as the edges might be sharp. Make a Rain Gage Craft Instructions (Teacher-Made) - Twinkl To build a rain gauge with your children, simply follow the steps below. Cut around the plastic bottle about 10 cm from the top. If you like, you can place some small rocks in the bottom for weight. Take off the lid and turn the top part of the bottle upside down, like a funnel. Place it inside the bottom part and fix it in place with tape.
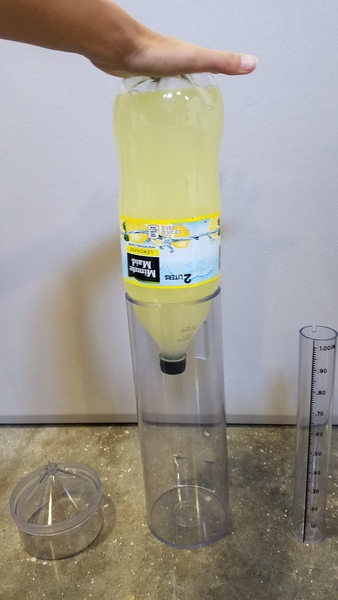
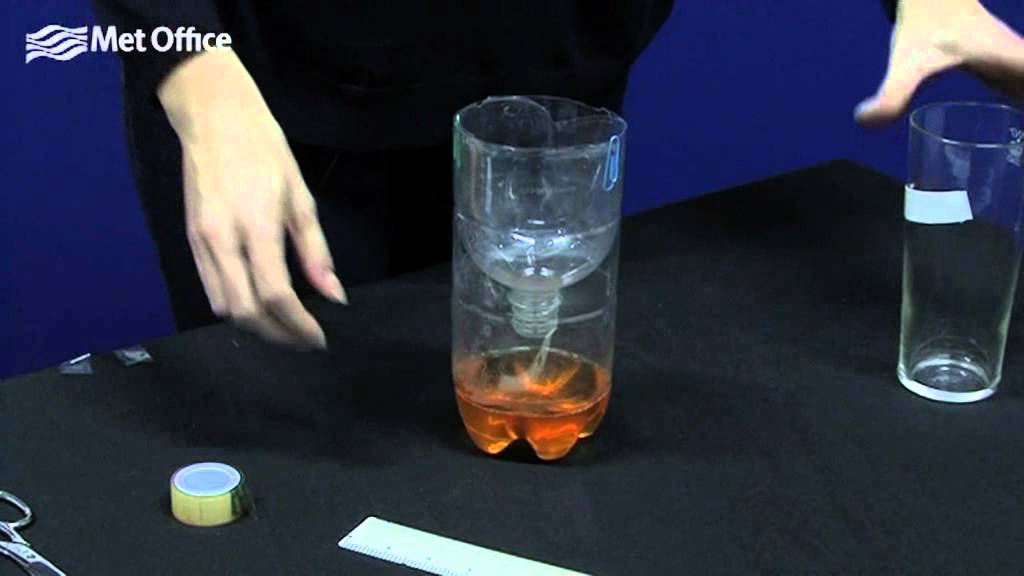
How To Make A Rain Gauge - Super Easy and Fun Weather Project Making a rain gauge is a fantastic way to help kids connect more with natural weather patterns where they live. It also gives them a chance to practice their measurement and math skills. Meteorologists and many other professionals use rain gauges as very important tools in the work that they do. How to make your own rain gauge | National Trust for Scotland Make a rain gauge Find out how much rain falls where you live by making your own measuring device. Step 1 Carefully cut around the plastic bottle about two-thirds of the way up. Cutting the plastic bottle Step 2 Pour in 100ml water and mark it all the way round to create a flat starting point for measurement. Step 3 How to Make a DIY Rain Gauge - Wind and Weather Tools Step 1: Clean your bottle and remove the label. Using scissors or a box cutter, cut the top off a half inch below where the tapering ends (see image below). Step 2: Take the top of the bottle and turn it over like a funnel. Stick it into the bottle and fasten it in place with the paper clips. How to Build an Easy DIY Rain Gauge | Mombrite How to Build Your Own DIY Rain Gauge Supplies: Empty plastic bottle Pebbles or marbles Permanent Marker Ruler Pair of scissors or an X-Acto knife Tape Instructions: 1. Cut the top off the bottle. Use a pair of scissors or an X-Acto knife to carefully cut the top off the empty plastic bottle. Cut about 2 inches down from the top.
Make a Rain Gauge to Study Precipitation | Lesson Plan
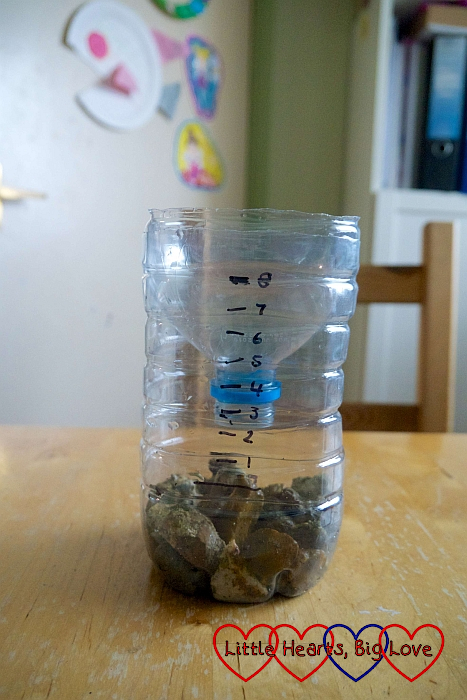
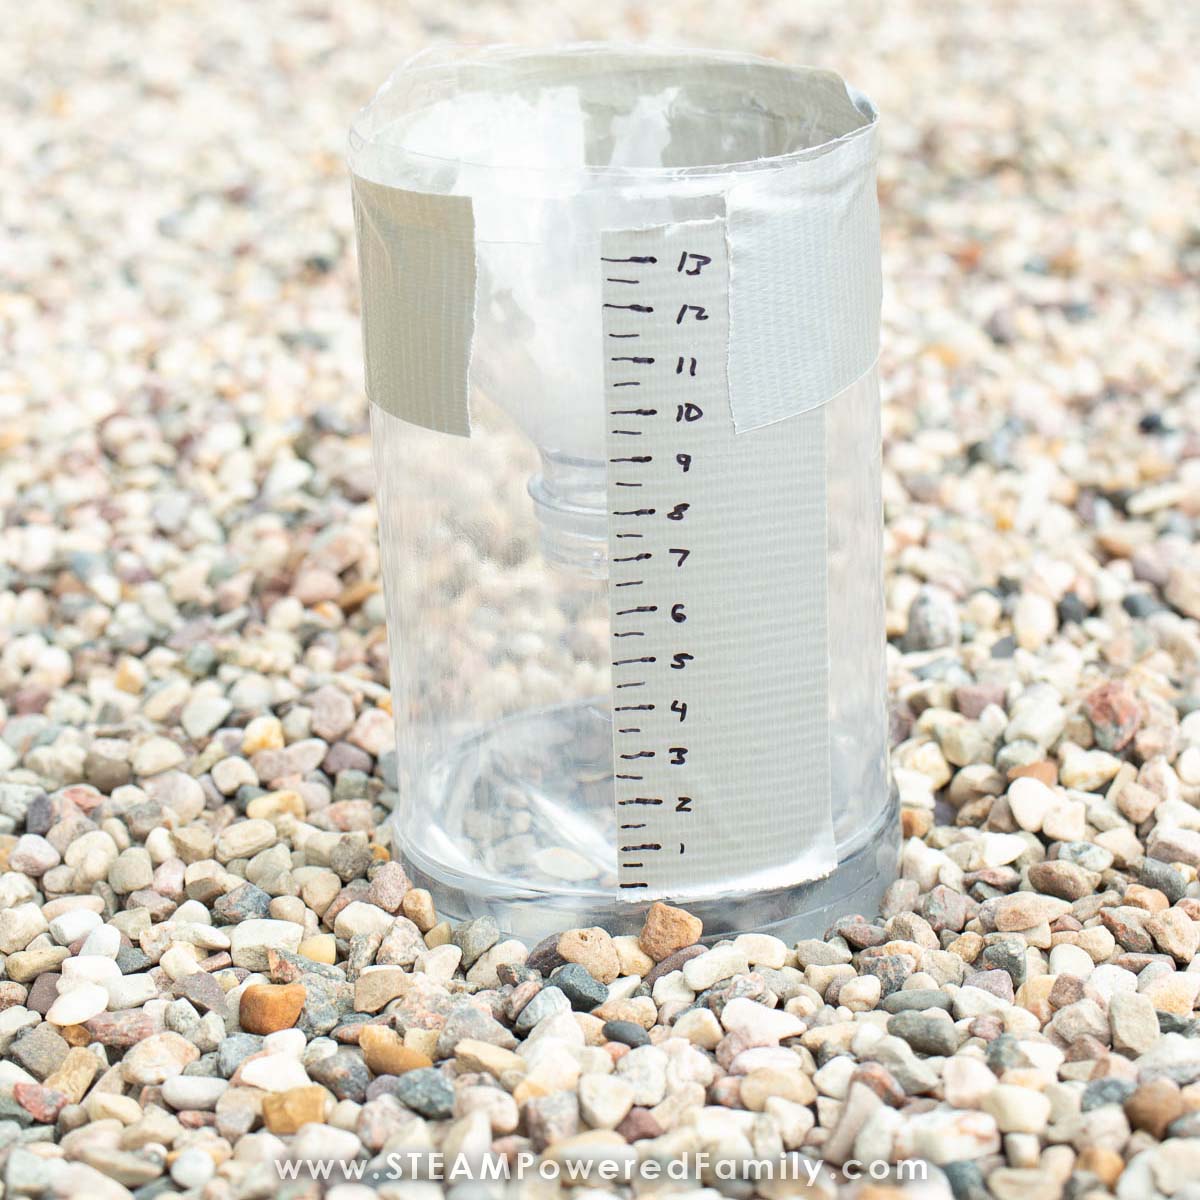
Making a Rain Gauge - Community Playthings Use a ruler to mark measuring increments starting about 2" from the bottom. 2. Place several small rocks in the bottom (for weight), then fill the bottle with water to the 0 mark. This will calibrate your gauge. 3. Invert the top of the bottle into to rain gauge to act as a funnel. Place gauge on a flat surface outside.
How to make a rain gauge :: backyard science experiment ...
How to Make a Rain Gauge - The Homeschool Scientist Many projects on how to make a rain gauge use a plastic bottle, but the plastic is prone to breakage and tips over easily in a storm. The rain gauge we created is more durable and waterproof. After making the rain gauge, use our rainfall chart printable to track the amount of rainfall in your area.
How To Make A Rain Gauge | DIY Science Project Ideas For Kids
Make a Rain Gauge to Study Precipitation | Lesson Plan - Science Buddies If you use the water hose to model rain: Let the students place their rain gauges in groups. Test the fine mist (soft rain) kept steady for 30 seconds and the heavy rain that lasts 10 seconds. Make sure to point the hose up so the water comes down almost vertically over the gauges.

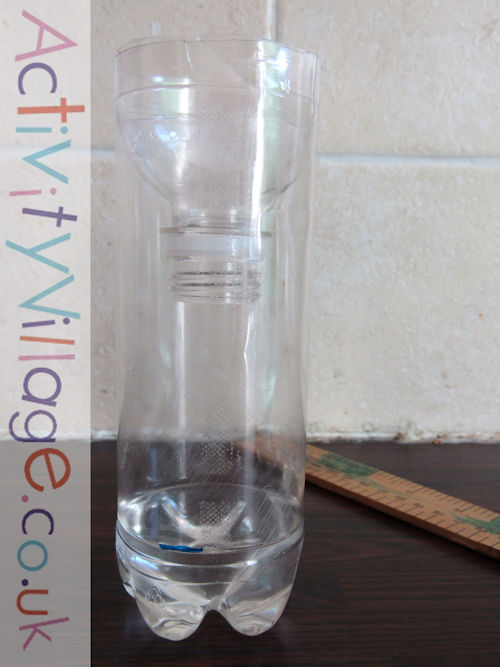
DIY Rain Gauge | Science project | Education.com | Rain gauge ...
DIY Rain gauge craft for kids - Mama's Must Haves A rain gauge is a meteorological instrument that is used to measure rainfall over a specific time and area. Making a simple rain gauge is a quick activity for outdoor learning, and it's perfect for younger children! The next time you check the weather and see rain in the forecast, you can share the weatherman's prediction with your children…
Making a Rain Gauge – Children's Furniture
How To Make a Rain Gauge - Ultimate Scouts Follow along with this video to see how to make a rain gauge. DIY Rain Gauge. *Tip* - Place rocks or pebbles in the bottom of your bottle to keep it from tipping over. Fill water to just above the rocks and mark that spot as 0″. You can now measure any rain fall from that measurement. Cub Scout Awards Tracker - (With Free Printables)
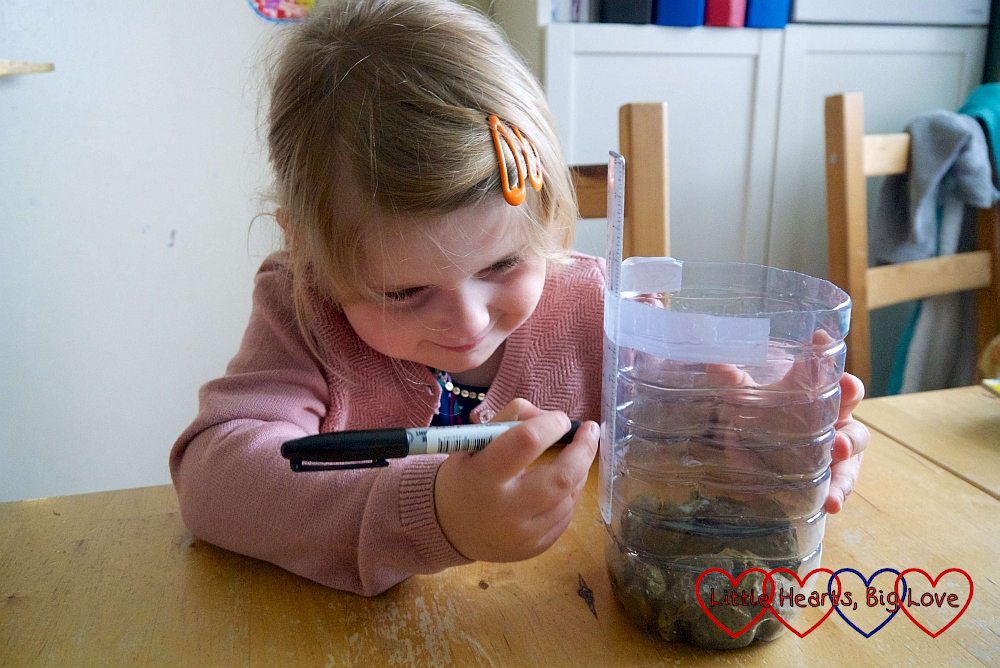
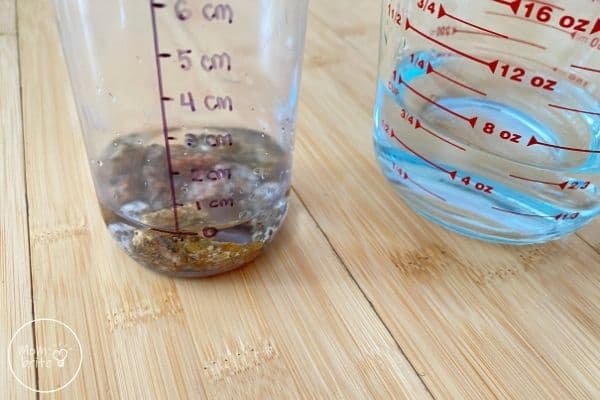
Crafting with kids: Making a rain gauge - Little Hearts, Big Love

Weather Experiment: Make your own rain gauge | FOX21 News ...

How to Make a Rain Gauge out of a Plastic Bottle: 9 Steps

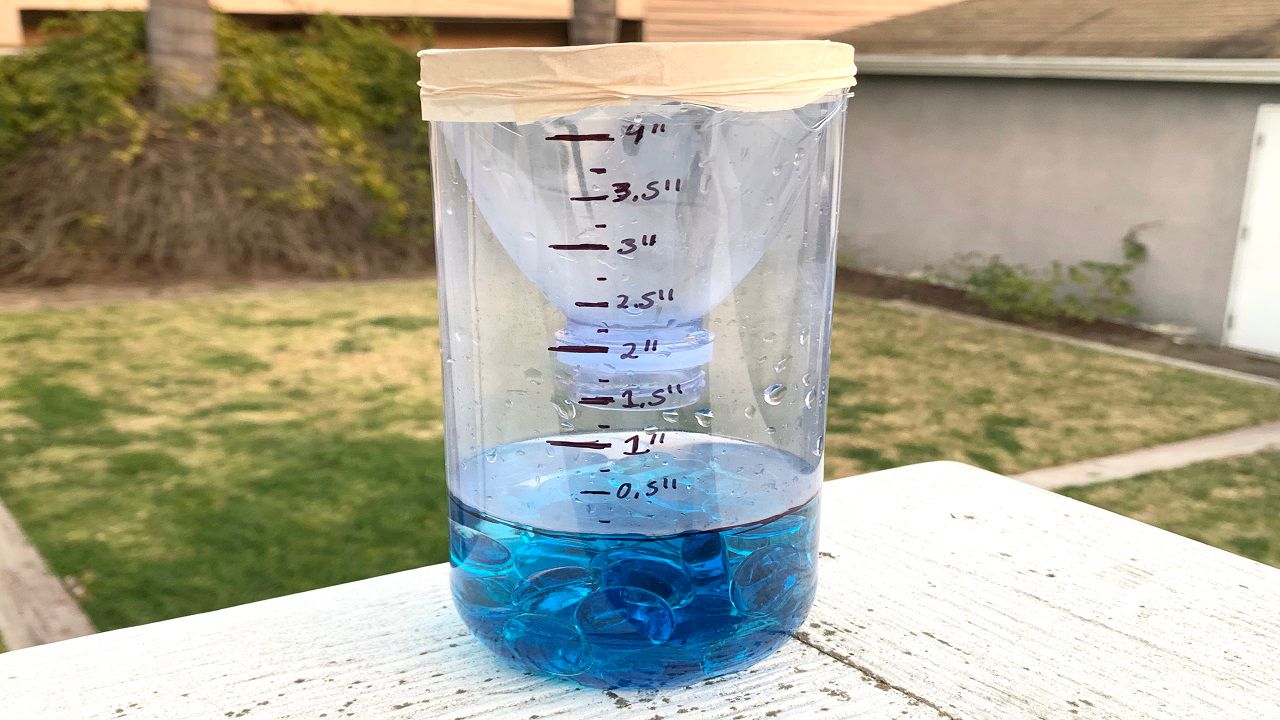
🎈 Public Lab: Make an accurate soda bottle rain gauge
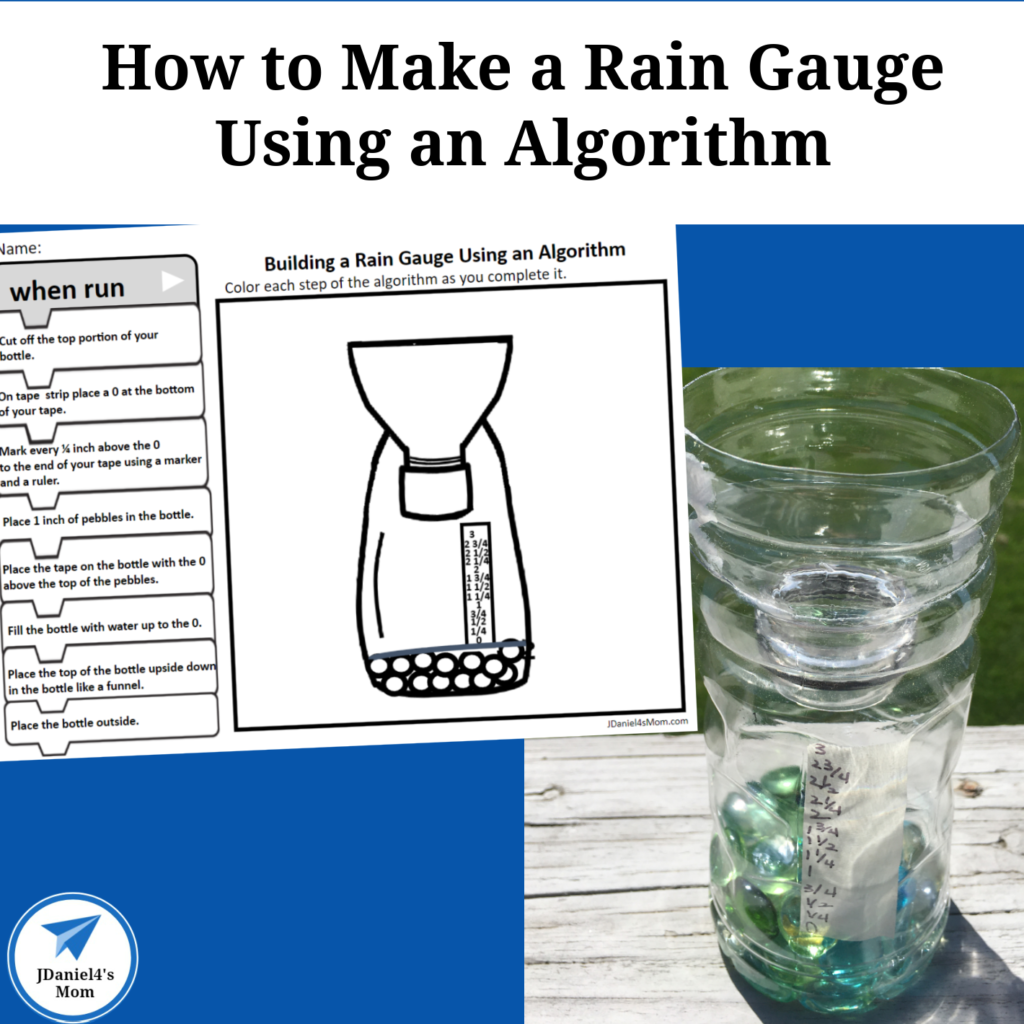
How to Make a Rain Gauge Using an Algorithm - JDaniel4s Mom

Build a Rain Gauge Steam Activity for Preschoolers - Sixth Bloom

Read Make A Rain Gauge Online

How to Make a Rain Gauge out of a Plastic Bottle: 9 Steps
Weather Science - How to Make a Rain Gauge
/cloudfront-us-east-1.images.arcpublishing.com/gray/IHEQCNUIXRMBPJZ2CK5ZNKNEUI.jpg)
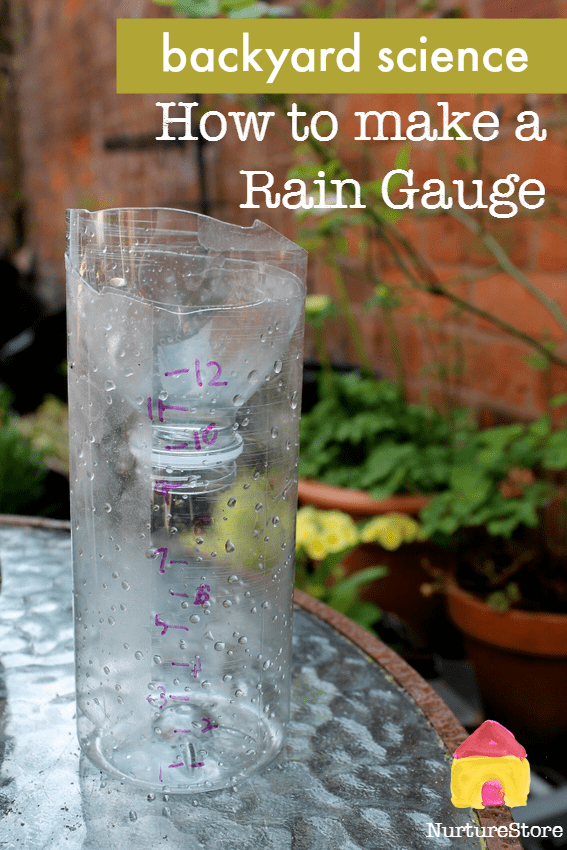
How to make your own rain gauge
How to Make a Rain Gauge

Making a Rain Gauge
How to Build an Easy DIY Rain Gauge | Mombrite

Making a Rain Gauge
Crafting with kids: Making a rain gauge - Little Hearts, Big Love

How to Build a Rain Gauge: 15 Steps (with Pictures) - wikiHow

How to Build a Rain Gauge: 15 Steps (with Pictures) - wikiHow
Meteorology at Home: DIY Rain Gauge | Discovery Place Kids ...

How to make your own rain gauge | National Trust for Scotland

How To Make A Rain Gauge | Rain Gauge Model | Rain Gauge | Make a rain gauge
How To Make A Rain Gauge - Super Easy and Fun Weather Project
🎈 Public Lab: Make an accurate soda bottle rain gauge

How to make a Rain Gauge! – Roundthorn Primary Academy Science
How to Build an Easy DIY Rain Gauge | Mombrite
Make a Rain Gauge to Measure Rainfall
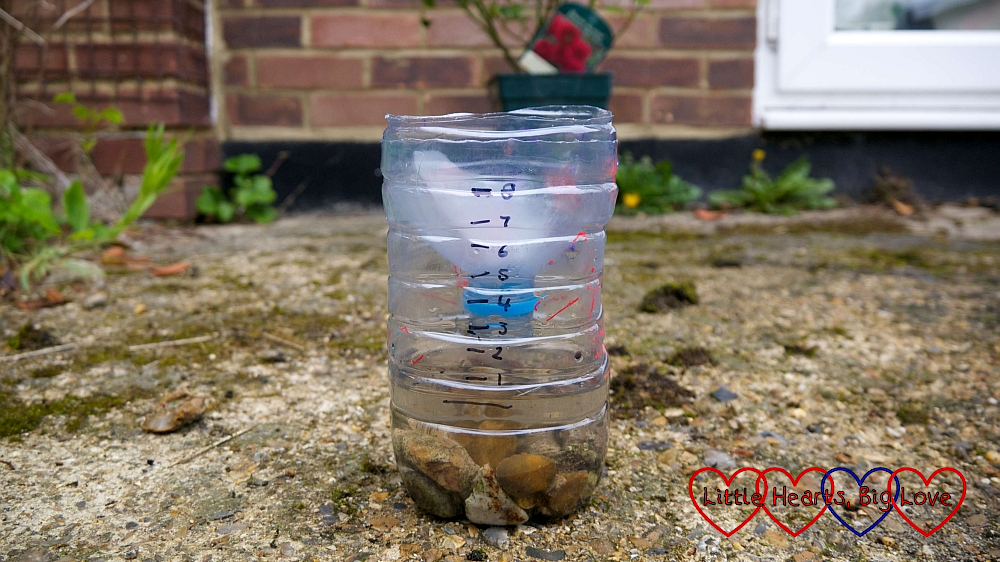
Crafting with kids: Making a rain gauge - Little Hearts, Big Love

How to make a rain gauge
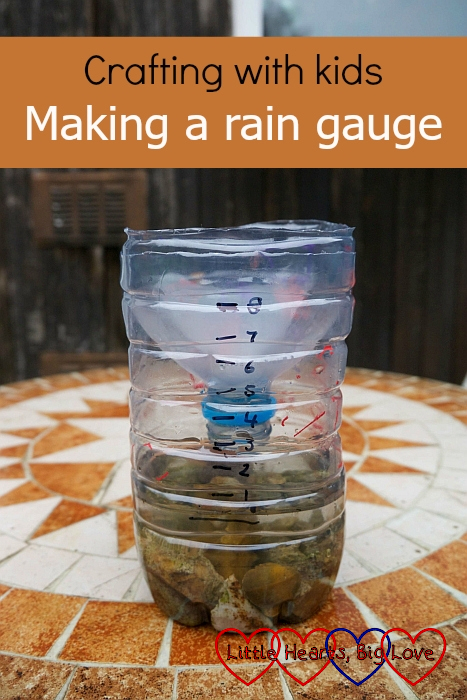
Crafting with kids: Making a rain gauge - Little Hearts, Big Love
How to make a rain gauge :: backyard science experiment ...
Make a Rain Gauge
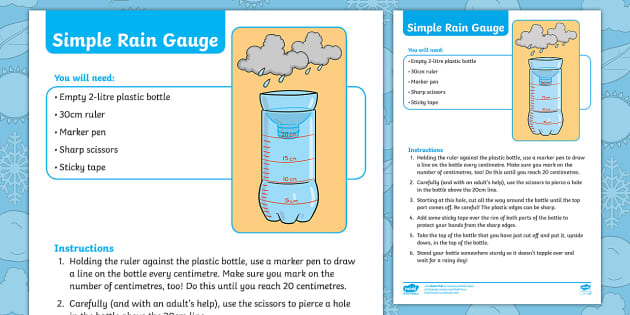
Simple Rain Gauge Craft Instructions | Primary Resources
Weather Science - How to Make a Rain Gauge
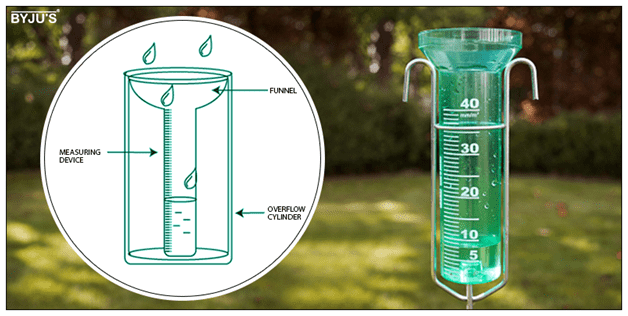
Rain Gauge Experiment and Science Project Work @ BYJU'S

How to Build a Rain Gauge: 15 Steps (with Pictures) - wikiHow
How to collect rainwater in your own backyard
Make your own rain gauge
0 Response to "41 making a rain gauge"
Post a Comment